ShopDreamUp AI ArtDreamUp
Behind the scenes - creativity during crisis
RANDOM TRIVIA! Warning, this is a long ass post! It's a VERY casual post, basically the same kind of rambling session you'll experience at 2am in a pub with me, so if you want, find some time, grab a beer (or wine, I recommend red) and let me sweep you away into the life of some eccentric artist from Africa :D This Journal is about: - how the Millerstreet Randomness set came to be... - how I used my art to deal with things I was going through - some of the hidden motivations behind some renders - what I modeled for this set - Insights into the girls' thoughts and motivations during the Randomness set - some questions for you at the end about what you're most proud of Throughout the drama of 2020 (and for me 2021) I think we all needed to push ourselves extra hard to keep going, didn't we? For me, my online sessions have kept me going, forced me to persist, think of new things, jokes, comebacks, ideas, naughtiness. In 2020 that resulted in a crazy online session called "The
Girlfriend achieves life goal!
Many of my characters are in part inspired by my girlfriend, who is quite a unique chick! Xtina's nerdiness, Laila's shortness curse and quirkiness, and Lali's overt naughty ideas all pretty much come from my girlfriend with whom I've been for 8 years now. I cannot share too much about her background for privacy reasons but what I can say is that she started out much like me, an airhead, a dreamer, that just wanted to play and draw pictures, hopeless at school but then motivated to turn things around because of people not having much faith in her... ... she fought her way through the ranks with pure determination and finally landed a job at a AAA Gaming Studio! They just released their newest game on which she intimately contributed: Lego Star Wars: The Skywalker Saga! I could not be more proud! We're getting drunk tonight!
Be Right Back!
Hey you wonderful people. This is just to let you know that I'll be away from my render stations for about ten days starting today. I have a bunch of pics of Maria finishing her poem ready to post but I'll probably only be able to post them tomorrow or the day after (I'll try post them today, but might not have time). As some of you might remember, I went to Africa this June because of a sick family member. You might also have noticed that I've been a bit withdrawn the last few months. Usually I try keep you all out of these kinds of things as you come here to feel happy and not to feel sad. But I think I need to be open with you guys, for you've been amazing all this time. Sadly, my mom passed away last night after a long battle with cancer. She went peacefully and painlessly and all my sisters were there. Unfortunately it went so fast that I wasn't able to make it in time, but it was ok. My mom and I were very close and although I am sad and I will miss the old girl, both my mom and
Uncle Errol's Ramblings: how I use HDRI
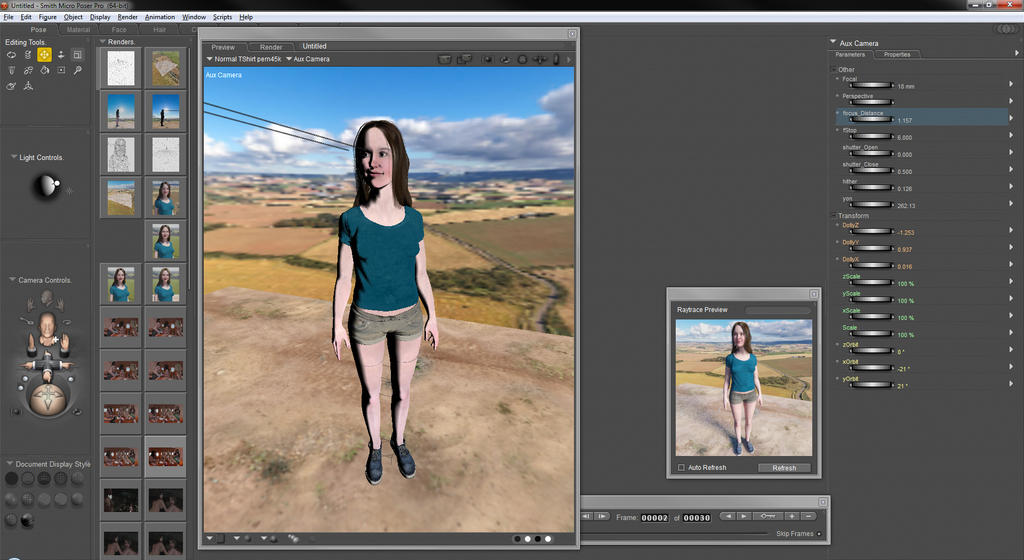
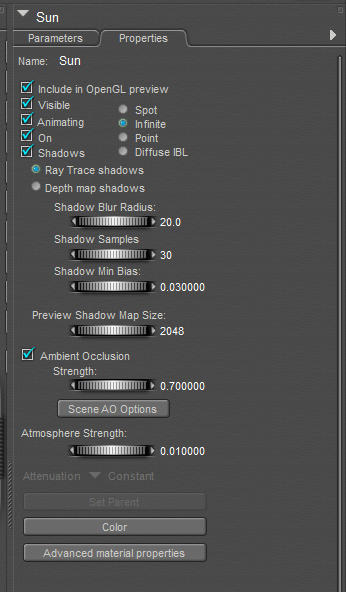
Just a quick disclaimer: This is not really a tutorial but more an essay on how I use HDRI, it could still be useful though. I am not an academically trained expert at any of this. This is all learned through the years, either from tutorials, books, videos or from other artists. If there's anything that doesn't make sense or is wrong, let me know! . Also, it's called a rambling session for a reason. I don't want to spend too much time planning and rather just get a whole bunch of stuff out. I've also had a crazy ass week so I hope the whole thing make sense! . Also, if you see a lot of full stops (periods '.') between my paragraphs, that is because of Deviant Art's new journal editor, it doesn't seem to remember where you prefer to add spaces to format your Journal and make it readable. . I may have come across as a little dismissive of HDRIs in my previous rambling session about lighting, but I actually use HDRIs almost all the time, just not always in the way that other folks
Featured in Groups
© 2017 - 2024 erogenesisCGI
Comments29
Join the community to add your comment. Already a deviant? Log In
"My GF assembling an IKEA closet." 
You really are a case to part.
Thank you so much for the tuto, Ero!
You really are a case to part.
Thank you so much for the tuto, Ero!


